
Register for an Account
Step 1: Read the Terms and Conditions and Privacy Policy and attest to the statements provided. When you are finished with this page, click “Next”.

Step 2: If you are the participant (i.e., person with the disease), please enter your information as the account holder. If you are a caregiver and/or legal representative, please enter your information as the account holder. When you are finished with this page, click “Next”.

Step 3: Select whether you are interested in being contacted by NORD regarding available studies. When you are finished with this page, click “Next”.

Step 4: Select “Next” so that an activation link is sent to your e-mail to complete registration.

Step 5: Click the link you are sent via e-mail. Please check your Spam folder if you do not see the e-mail. You will be taken to the following screen in a new tab within your browser. Set your password and click “Submit”.

Step 6: Your validation is now complete. Select “Go to Login Page”.

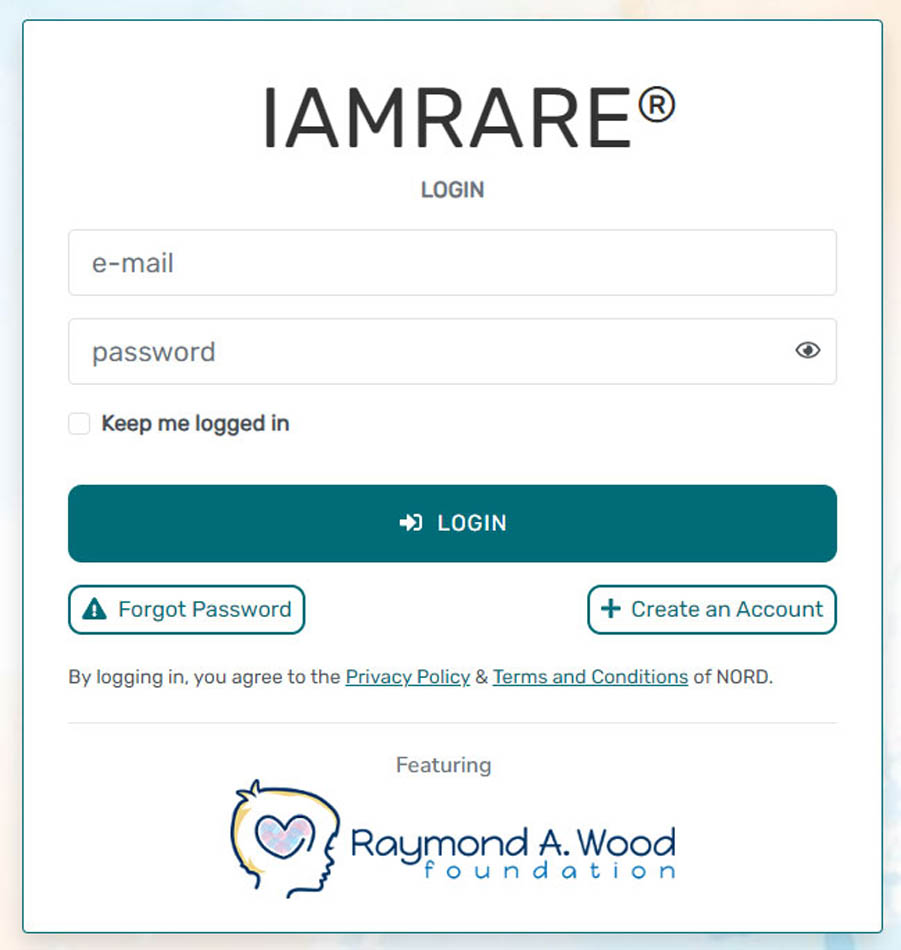
Step 7: Log in using your e-mail and password. Do not click on “Create an Account.”
Register a Participant
Step 1: To start, click Yes, register new participant.

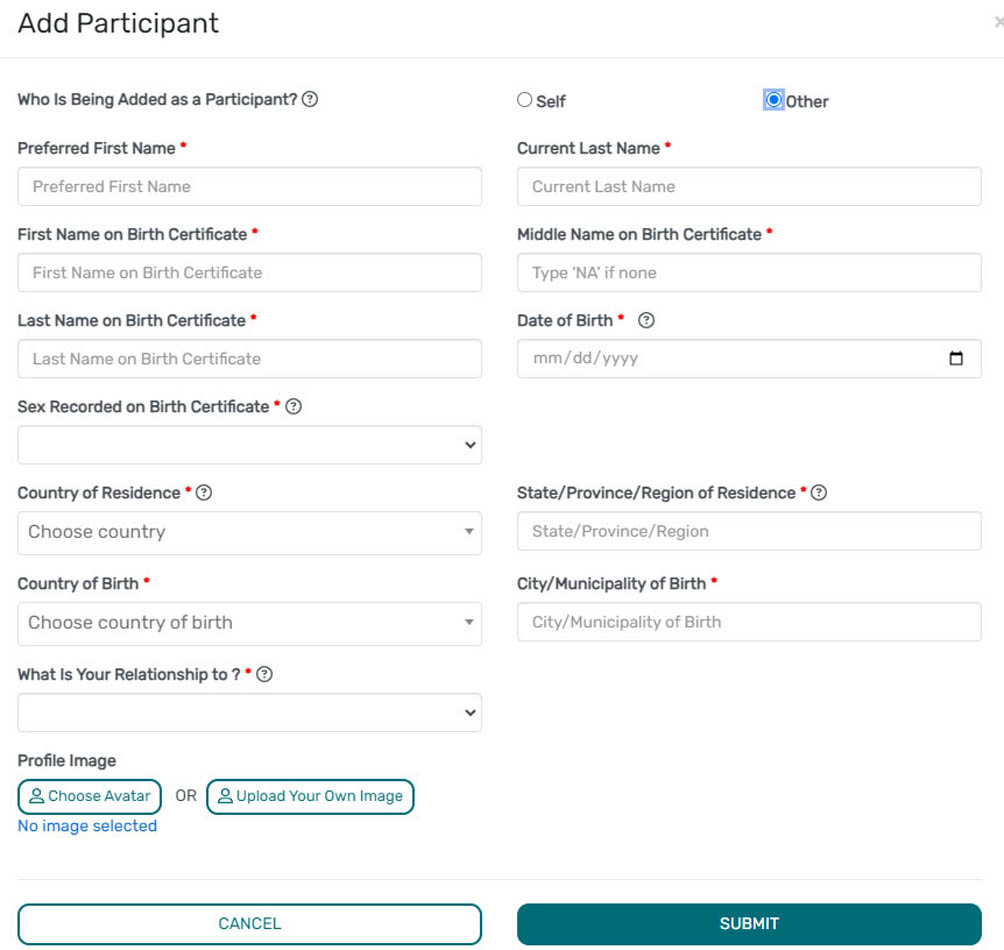
Step 2: If you are the Participant themself (i.e., the person with the disease), please enter your information Select Self for “Who is Being Added as a Participant?”.

Step 3: If you are a caregiver and/or legal representative, please fill in the information related to the participant (i.e., the person with the disease). Select Other for “Who is Being Added as a Participant?”.
Register a Participant
Step 1: To start, click Create New Profile.
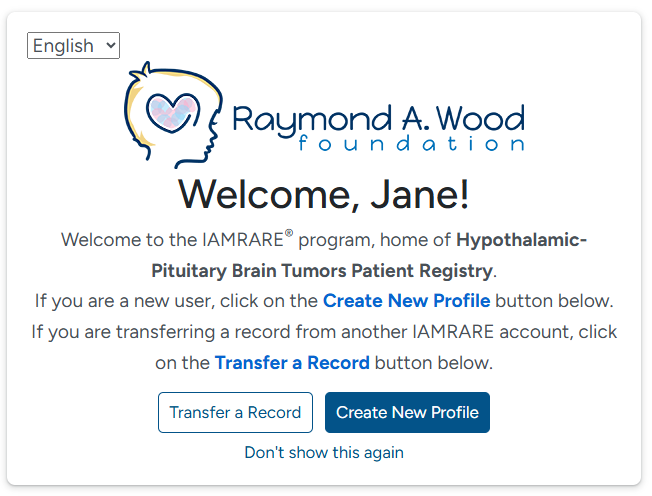
Step 2: Select who you will be providing information about.

Step 3: If you are the Participant themself (i.e., the person with the disease), please enter your information Select Self for “Who is Being Added as a Participant?”.

Step 4: If you are a caregiver and/or legal representative, please fill in the information related to the participant (i.e., the person with the disease). Select Other for “Who is Being Added as a Participant?”.

Consent to the Study
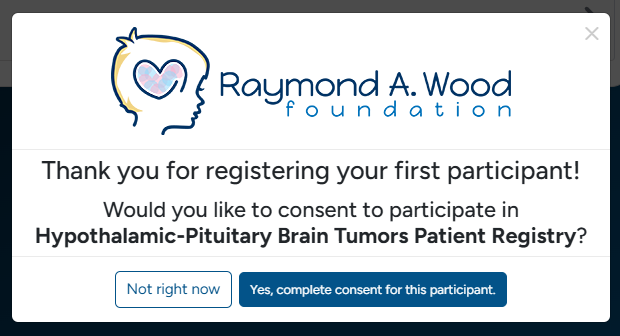
Step 1: Click on “Yes, complete consent for this participant.”
Step 2: Scroll down and read through the consent form thoroughly. Once you finish each page, click the “Next” button. Once you reach the Authorization form, read through the statements thoroughly. If you are comfortable consenting to participate in the study, please read each statement and authorize your consent. After checking the boxes, click “Next.”


Step 3: Once you click “Next” and reach the Thank You page, click “Continue to Opt-Ins”.

Step 4: Once you click “Continue to Opt-Ins” read through the opt-ins thoroughly. If you would like to receive information about the topic, check the box, and click “Save and Review”.

Step 5: Once you’ve reviewed your consent, click “Close”. You will then have access to start taking surveys.
Taking Surveys
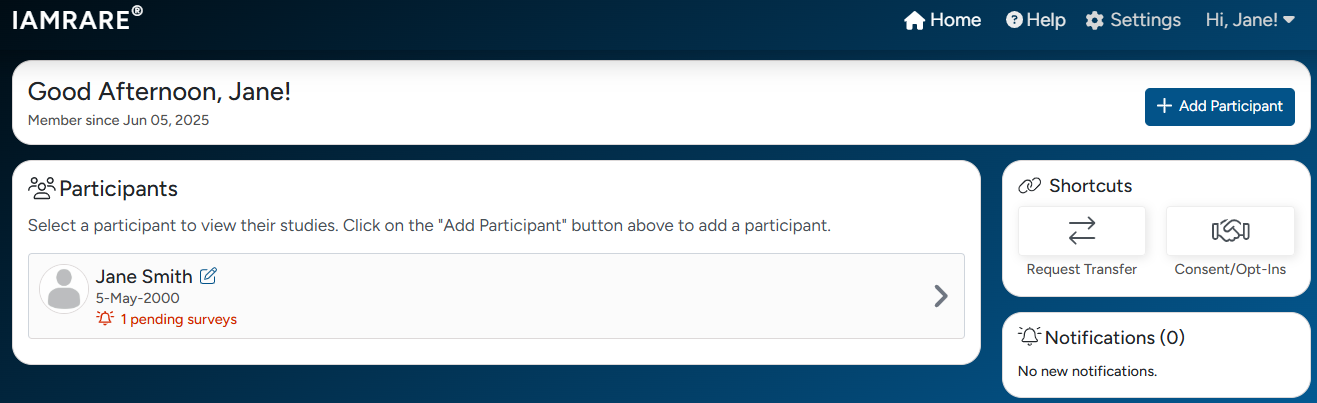
Step 1: Click on your Participant.
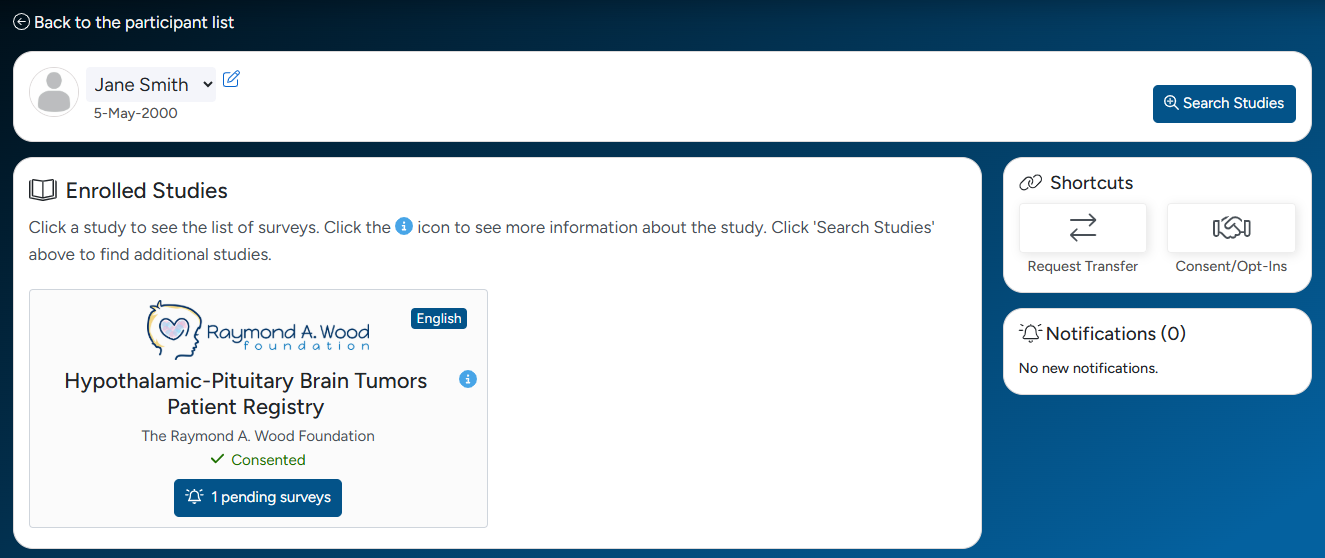
Step 2: Click on the appropriate study.
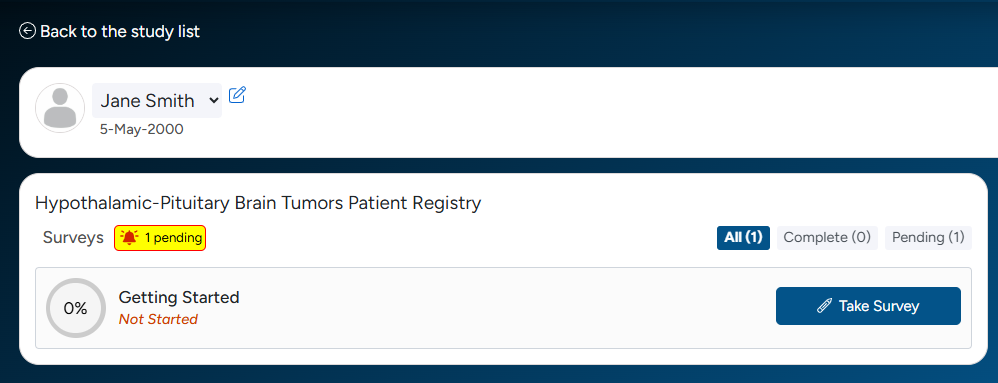
Step 3: You must first complete the “Getting Started” survey by clicking the “Take Survey” button.
Step 4: Then, you must complete “Demographics of the person with the disease” before taking any other surveys.
Step 5: You can then take the other surveys in any desired order. To save your work and return to a survey, click Save Progress. Your progress is saved automatically if you are using a mobile device.

View Responses and Reports
Step 1: Once you have submitted a survey, you are able to view your responses to that survey as well as the graphs for any questions that are programmed to show graphs. Click “View Responses” to see your completed survey. Click “Reports” to see any available graphs.

Step 2: You can also view the graphs for any questions that are programmed to show graphs. These graphs show the responses of all registry participants. Some graph types will display your own response. This is indicated by an arrow. Click “Reports” to see any available graphs.

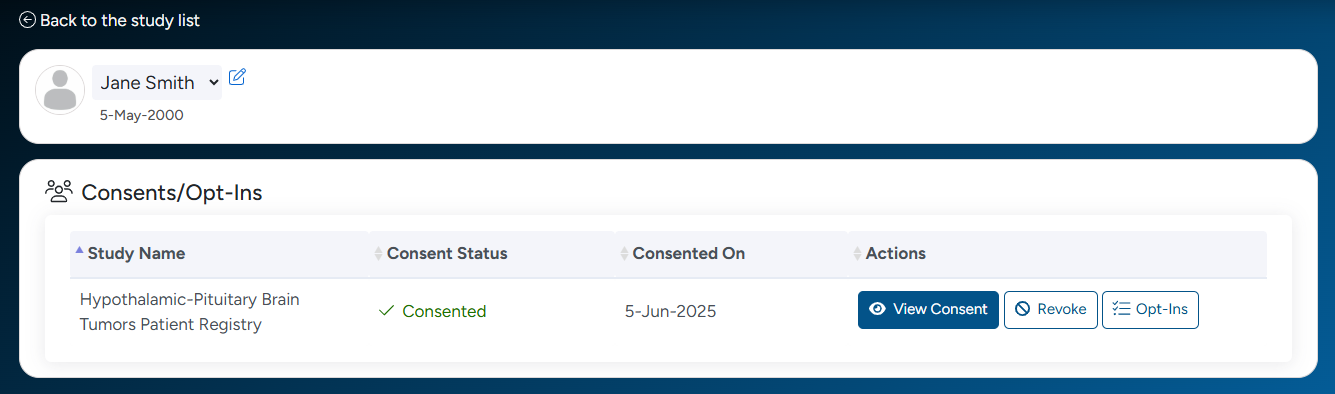
View Consents and Opt-Ins
Step 1: Once you have consented to the study, you are able to view your consent at any time. Navigate to the Enrolled Studies page. Then, click “Consents/Opt-Ins” to see your consent and opt-ins.
Step 2: You may revoke your consent at any time by clicking “Revoke”. You may also edit your Opt-Ins by clicking “Opt- Ins”.
Dark Mode Settings
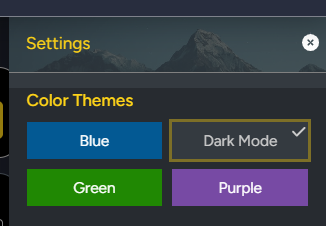
Step 1: You can view the platform in Dark Mode. First, click Settings.

Step 2: Select Dark Mode.

Step 3: Exit the Settings menu, and your selection will be saved.
Display Settings
Step 1: You can change the platform display settings. First, click Settings.
Step 2: Select a color theme, a font size, or language preference.

Step 3: Exit the Settings menu, and your selection will be saved.
Microsite Visibility
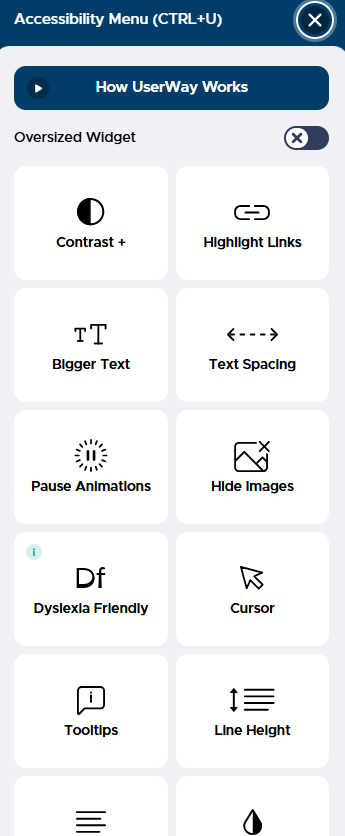
Step 1: You can change how you view the microsite (hptumorregistry.iamrare.org) using an Accessibility menu. Click the icon of a person at the bottom of the screen. You are able to change the settings such as the contrast, text sizing, and text spacing.

Need Assistance?
Step 1: If you need help while using the platform, click Help.
Step 2: Select an Inquiry Type and type a message.
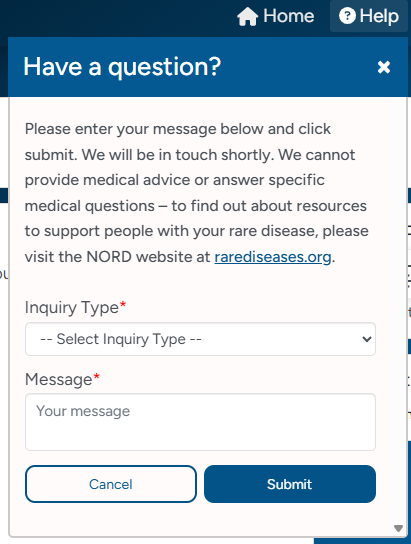
Step 3: Click Submit.
You may also contact the study sponsor directly by using the contact information shown on your dashboard or the study website.
